• Home
  • Stucco
    • Stucco Overview
    • FAQ
    • Stucco Gallery
    • Stucco Installation
    • Stucco Resources
  • Windows & Doors
    • Windows Overview
    • Doors Overview
    • FAQ
    • Windows & Door Gallery
    • Window & Door Installation
    • Resources
  • About
    • About Us
    • Showroom Gallery
    • Reviews
  • Contact
Reule Sun Corporation
Free Estimates
  • Home
  • Stucco
    • Stucco Overview
    • FAQ
    • Stucco Gallery
    • Stucco Installation
    • Stucco Resources
  • Windows & Doors
    • Windows Overview
    • Doors Overview
    • FAQ
    • Windows & Door Gallery
    • Window & Door Installation
    • Resources
  • About
    • About Us
    • Showroom Gallery
    • Reviews
  • Contact
Picture

Our Proven Installation Process

Introduction
Step 1
Step 2
Step 3
Step 4
Step 5
Step 6
Step 7
Step 8
Step 9
Step 10
Introduction

Introduction

A superior seal to the building is facilitated when replacement windows are installed with an integral factory nail fin, the same as is required for a new construction installation.  The aesthetics are also greatly enhanced, considering the stucco will abut directly to the new window frame and supersede the need for trim pieces that have been systematically utilized for replacement windows in the past.  A nail fin installation for replacement windows is very similar to the methods utilized for a new construction installation, and one that is adopted and regulated by many State, County and Municipal Building Departments for replacement window installations.  In New Mexico, Bernalillo County, Los Alamos County, the City of Rio Rancho and the City of Albuquerque all require the nail fin installation method for replacement windows in stucco homes. For the installation into a stucco finish, our windows are ordered with an integral nailing fin, which is an attached flat projection that runs perpendicular the perimeter of the window frame (like a dorsal fin to a fish), and lays flat against the building sheathing (OSB or Plywood).  This nailing fin allows sealant and flashings to be transitioned from the existing paper vapor barrier to the new replacement window, for a complete weather-tight, waterproof, air barrier.  The application of the stucco system then provides additional weather resistant protection, but it is the nail fin and flashings that create the ultimate weather proof seal, when properly integrated to the existing building envelope. ​
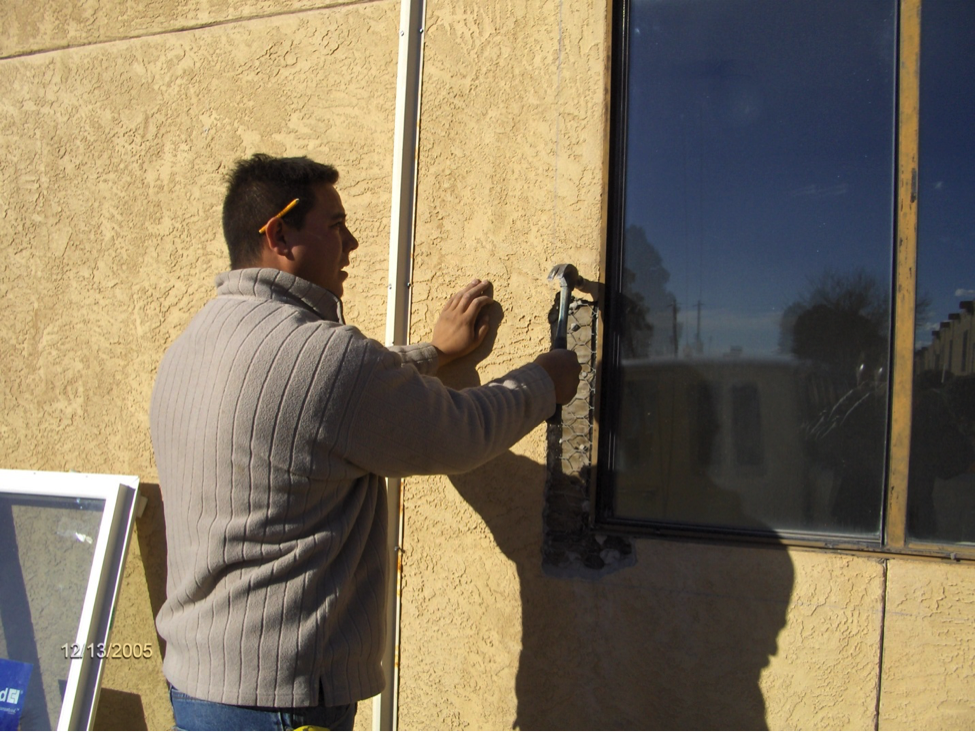
Step 1

Step 1

We take care to break out the stucco around the perimeter of the old window from 4” to 6”, exposing the building paper and stucco netting.
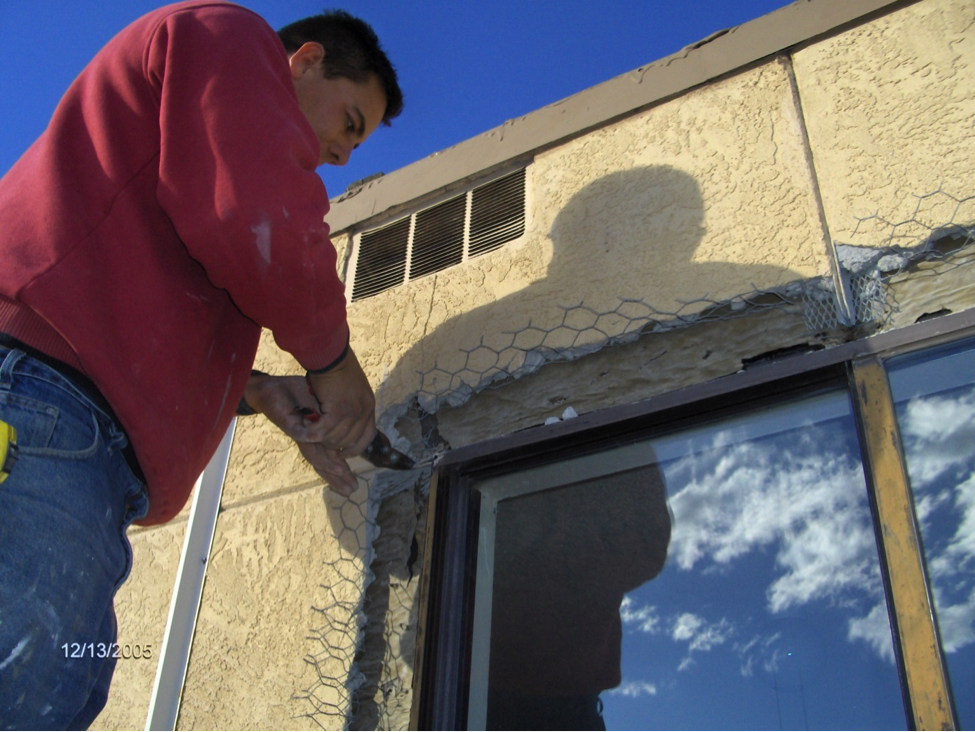
Picture
Step 2

Step 2

The existing stucco netting (chicken wire) is folded back while at the same time exposing the existing building paper that must not be damaged or torn.
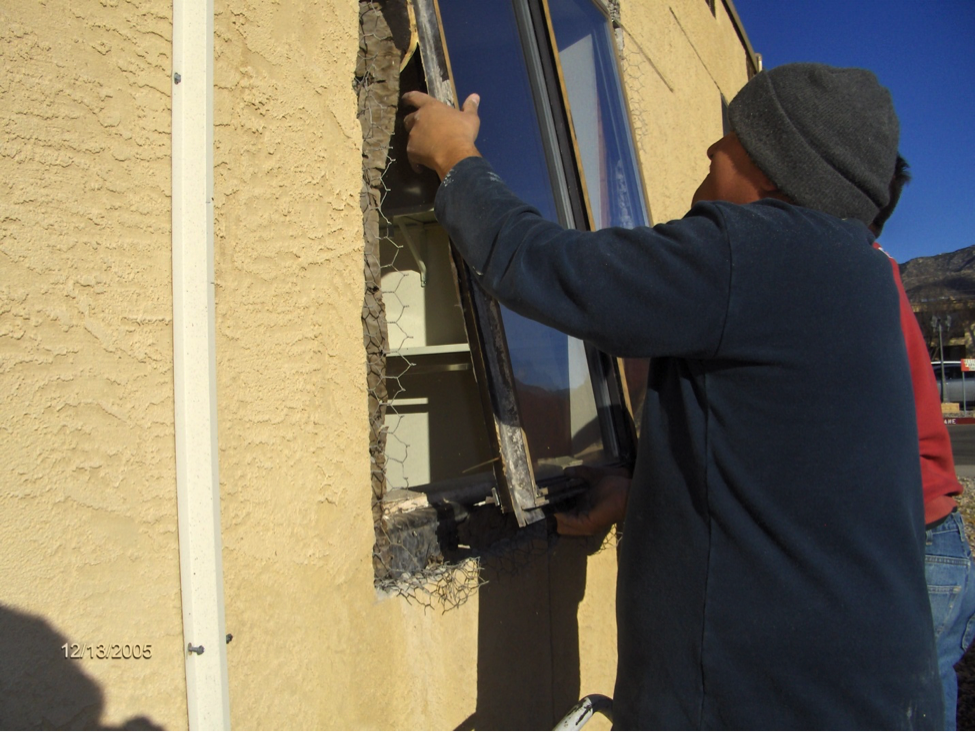
Picture
Step 3

Step 3

The nails are pulled away from the nailing fin and the old window virtually falls out, leaving a clean, unobstructed opening for the new window.
Picture
Step 4

Step 4

A “Sill Pan” is created with an application of Protecto Wrap BT25XL peel and stick rubberized flashing tape at the horizontal sill surfaces of the framing, up the sides several inches and then overlaps the existing building paper at the bottom, to maintain the “shingle effect”.
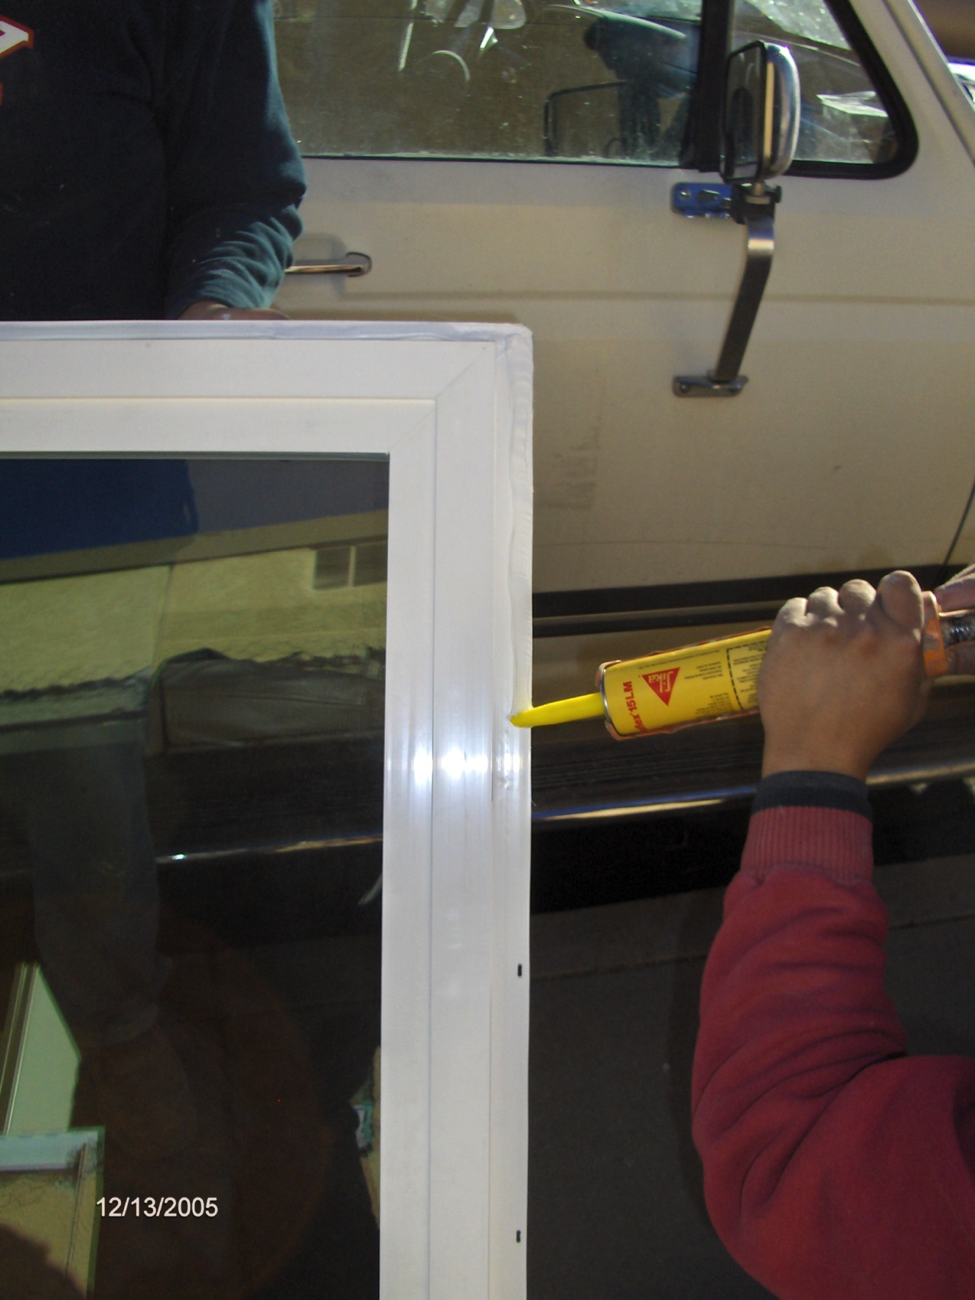
Picture
Step 5

Step 5

Caulking is applied to the backside of the nailing fin at the sides and top and then the new window installed into the opening. The window is leveled, plumbed, trued up, and secured with screws through the nail fin to the existing framing, providing a reliable attachment and weatherproof interface to the building.
Picture
Step 6

Step 6

Picture
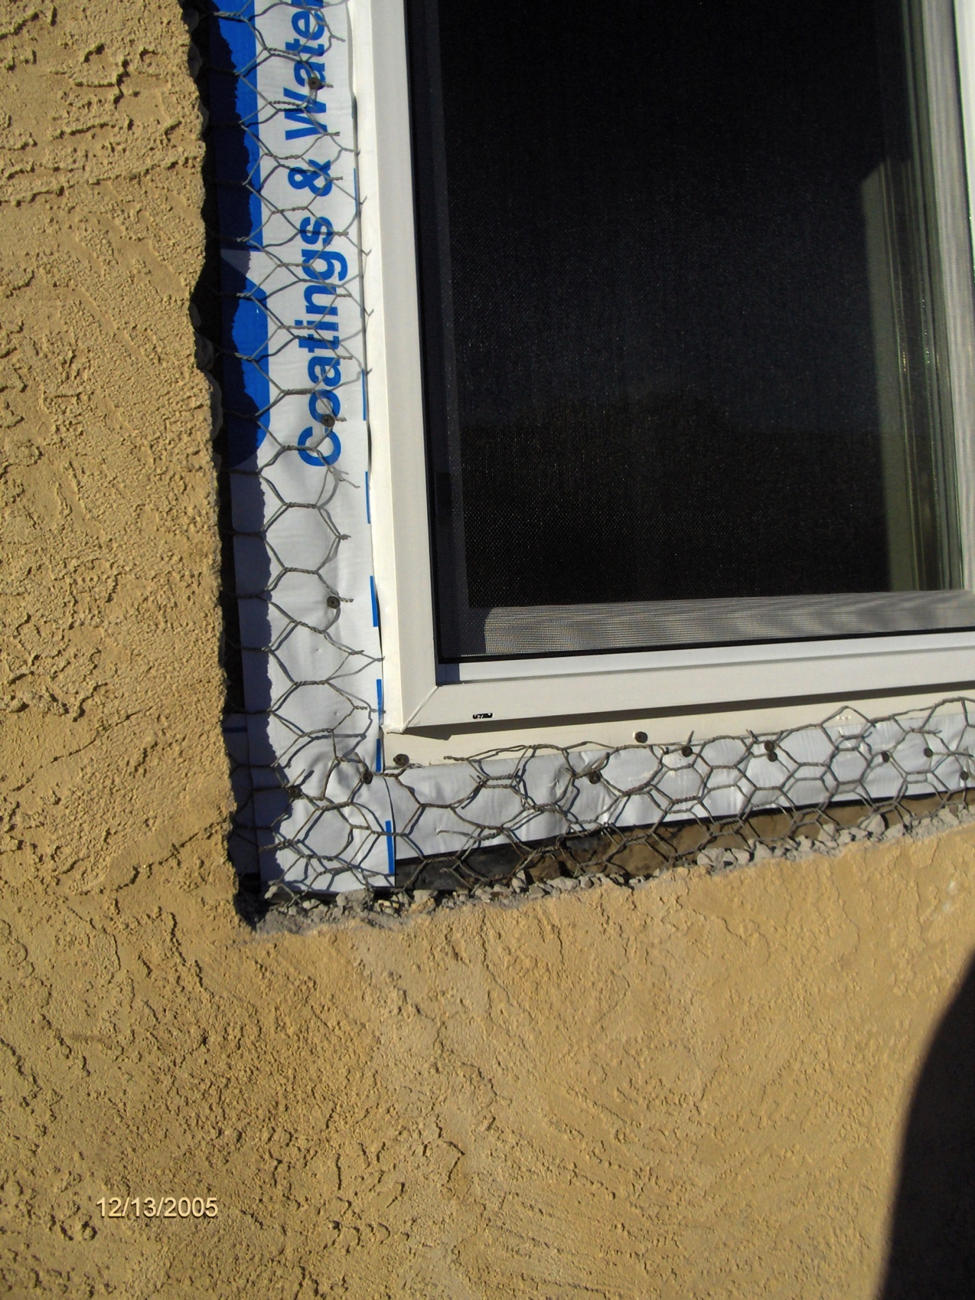
Protecto Wrap window flashing adheres to the nailing fin and over the existing building paper at the sides, and under the existing building paper at the top. This flashing application method is commonly referred to as the “shingle effect” and is the same water management method employed for shingle roofs, allowing the moisture to cascade downward from the top to bottom without entering the building envelope.

At this point of the installation, your new windows / doors are completely secured and sealed to your home, providing the ultimate protection against the weather elements. This work is accomplished by our highly trained window technicians, who are hourly employees and have undergone rigorous training for the Reule Smart Seal installation system. Once your windows are property installed with the Reule Smart Seal system, the stucco at the peri meter of the windows will require patching prior to the finish coats.
Step 7

Step 7

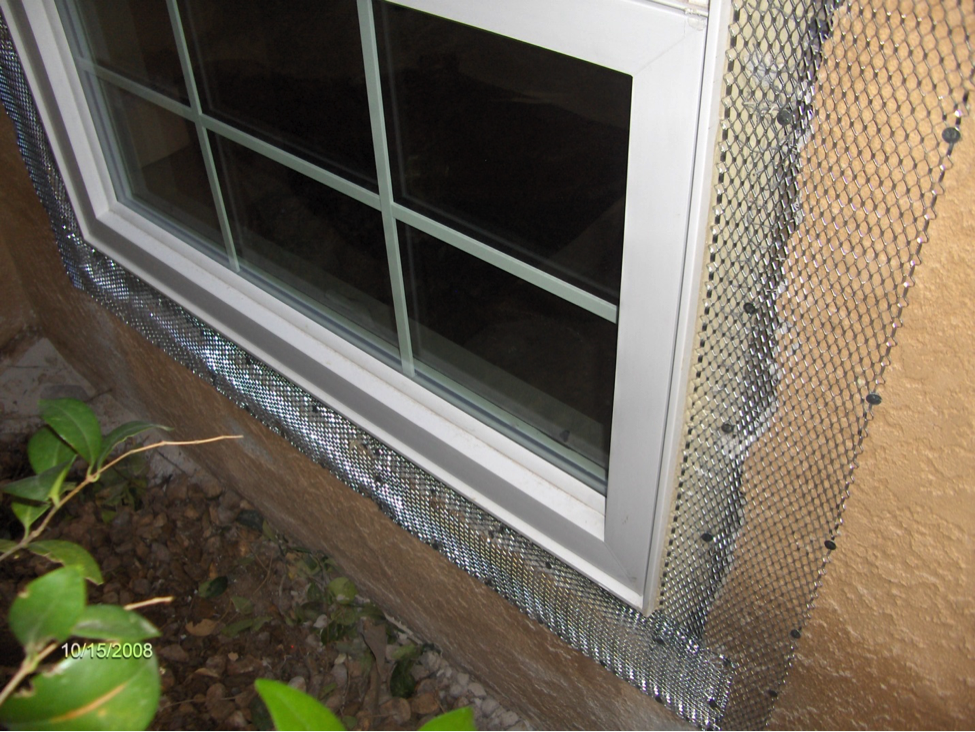
The existing stucco netting (chicken wire) is folded back into place and new layer of diamond sheet metal lath applied over the stucco netting from the frame of the window and onto the adjacent stucco surfaces.
Picture
Step 8

Step 8

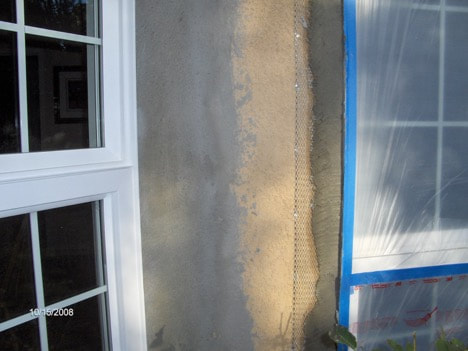
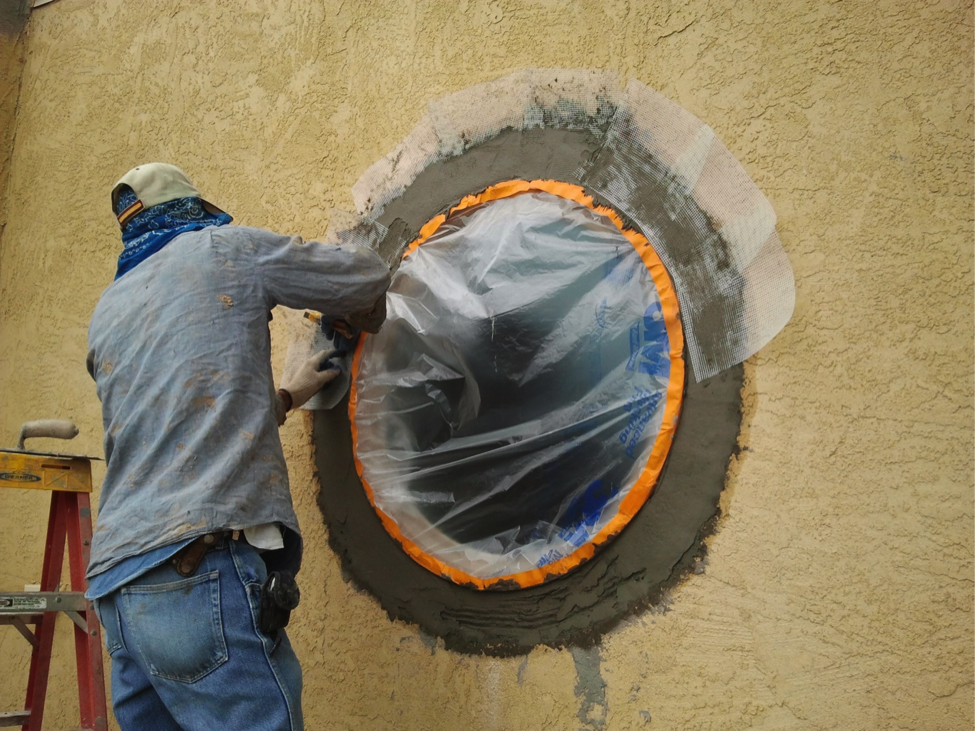
The acrylic fortified fiberglass reinforced stucco base coat is applied over the metal lath, and floated onto the existing stucco surfaces to maintain a smooth transition. Depending on the depth of the patching, a second layer of basecoat may be required.
Picture
Step 9

Step 9

A thin layer of Crack Master high performance polymer cement with embedded polyester mesh is applied over the base coat, to minimize any crack translation through the finish coats.
Picture
Step 10
Step 10
Finish coats are applied after a proper 28 day cure of the base coats and Crack Master system.
Picture
Picture
From the salesman to the project manager to the workers, this was professional pleasurable experience. The company's culture was evident as everyone bent over backwards to ensure that the customer experience was optimal. They brought their own portable toilet and were very gentle with plants and bushes. The salesman Steve and foreman Jay communicated through the phases of project and most importantly of all, my house looks better than my neighbors' who used what looked like "two guys and a truck". I called the office and the owner Bob Ruele picked up the phone - hands-on service. I would highly recommend this firm.
— S. Collins, Albuquerque
Reule Sun did a fantastic job of re-stuccoing our home, and also painting the trim. Steve, Jay and the 
entire crew were a pleasure to work with from start to finish. We were very impressed with the quality of 
their work and the attention to detail. We highly recommend Reule Sun!!
— Ron S., Rio Rancho
The work went well. They gave us a clear quote, scheduled the work in advance, did nice work in a 
timely fashion. Our house looks very nice! Thanks!
— Lisa B., Albuquerque
It all went pretty smoothly. The only comment I would have is that it is hard to find someone in the 
office without making an appointment, no matter what hours they have posted.
— Andrew A., Albuquerque
Reule Sun did a FABULOUS job on our house, with incredible attention to detail, extremely thorough preparation, total job-site neatness and cleanliness, lightning responsiveness to any issues which arose, and a very high level of craft. The workers were polite, respectful, friendly, and very conscientious. You will pay for this. But we found it more than worth the difference. After watching our job, the neighbor across the street has hired them for a complete stucco job and also new windows. (If your windows are within shouting distance of needing replacement, do these just ahead of the stucco job.)
— Dallas P., Albuquerque
Reule Sun was excellent throughout the entire process. Steve Savage provided the cost estimate and was very professional in explaining what was needed and presenting options for the work. Bob Reule was flexible with the schedule when we needed to move the job from late 2015 to early 2016. All the installers did an excellent job, which included significant prep work prior to the finish. Miguel and his finishing crew were especially good. They spent almost 5 days completing their work, and the final result was terrific. Jay worked with us to ensure we were happy with the color and the overall effort. Our house looks great. I would definitely recommend Reule Sun for any stucco job.
— Allan C., Albuquerque
Bob was an extremely professional contractor to work with.  He provided several design options and was very tuned in to our vision.  He was always accessible, completed all work timely, and followed through with all our concerns.  We have no hesitation in recommending Reule Sun Corp.  We love the finished project!
— Dennis W., Albuquerque

    FREE Estimates
    Call us at 505-345-3200 to schedule a FREE in-home consultation or fill out the form below:

Submit
Reule Sun Corporation
​4100 Cutler Ave. NE
Albuquerque, NM 87110
​Phone: (505) 345-3200
Email: info@reulenm.com
​Hours: M-F 10:00a - 6:00p
STUCCO
Overview
FAQ
Gallery
Installation
​Resources
WINDOWS & DOORS
Windows
Doors
FAQ
Gallery
Installation
​
Resources
ABOUT
About Us
​License #21447
​Licensed, Bonded, Insured
Reule Sun Corporation BBB Business Review
Picture
© Copyright Reule Sun Corporation. All rights reserved.
Web Design by MIS, Inc.
  • Home
  • Stucco
    • Stucco Overview
    • FAQ
    • Stucco Gallery
    • Stucco Installation
    • Stucco Resources
  • Windows & Doors
    • Windows Overview
    • Doors Overview
    • FAQ
    • Windows & Door Gallery
    • Window & Door Installation
    • Resources
  • About
    • About Us
    • Showroom Gallery
    • Reviews
  • Contact